To all who mourn in Israel, He will give a crown of beauty for ashes, a joyous blessing instead of mourning, festive praise instead of despair. In their righteousness, they will be like great oaks that the LORD has planted for his own glory. Isaiah 61:3
Showing posts with label baking. Show all posts

Wednesday, October 29, 2014

Funeral Cookies

Tomorrow (the day before Halloween) at my boys' school, I get the seriously fun opportunity to educate the young minds of Mrs. Schlagel's 7th grade history class about mourning customs in the 1860s as well as ladies fashion from that era! I am so ecstatic I can hardly contain myself!!!  Seriously.  I am about vibrating out of my skin!!!  I LOVE Victorian mourning customs and mourning dresses!!  This is totally in the realm of my happiness!!

Mrs. S. approached me almost a month ago about doing an educational segment for her history class, as around Halloween time they would be learning about the oppression that was upon women and slaves in the 1860s.  We chatted about what she wanted (how even the clothing women wore could be considered restrictive) and I went home all a twitter, my brain churning out the possibilities of what I would teach!  As I thought about the outfit I would wear, my mind kept going to my 1863 mourning dress.  The mourning customs of the 1860s, if one chose to follow them, were very restrictive especially for women.  What another great aspect to tie into the theme of what Mrs. S. was teaching!  I turned to the internet searching for new information that I could pass along to the students.  I found a wonderful website called "Table Matters" run by the Pennoni Honors College at Drexel University.  On the site, they featured an article titled "A Snack Called Death".  I learned a lot about a new to me custom and they share a wonderful recipe for Funeral Cookies.  I was so excited to discover this new custom that I decided I needed to make some of these funeral cookies to share with the kids.

I wanted a fun way to distribute them and thought it would be nifty to put them in parchment envelopes the way the article says they were packaged in Victorian times.  I used a black wax seal with the "W" embossing stamp I have had since my wedding invitations went out almost 23 years ago.  Great idea in theory, will see how they are tomorrow.  Note to self:  wax doesn't like to stick on waxed parchment paper!  Oh well, the cookies are really delicious.  Not overly sweet like we as 21 century people who are used to eating...all sugary and sweet.  The ginger and molasses are the real stars of these cookies.  My boys and husband thought they were very tasty so that's a score!


Some of my mourning collection:  A tear bottle, deep mourning handkerchief, handkerchief pocket and an embossed mourning card. 


Close up of beautiful mourning card from 1868 for Joseph Heywood.


Black wax seals.  These turned out so beautifully!


Delicious and unusual funeral cookies.

So, if you are hosting a Halloween party, you might want to consider adding these to your menu!  Then tell you friends about the custom of funeral cookies and sin eaters (covered in the article linked above)!  Be sure to watch thier faces for their reactions!!

Be blessed my friends and if you are taking your little ones Trick-or-Treating Friday night, be safe!

g

Friday, June 27, 2014

The 1950s Dress and My Grandma Iva

One of my outfits for Costume College is a 1950s dress inspired by a dress I found on Pinterest.  I know, you are shocked!  hahahahaha!!  Anyway, this week I was wanting to get as much done on it as I could, but canning season has started here in the Treasure Valley and I had pie cherries that needed to be attended to.  Sour cherry jam, juice and gallettes were made to the delight of my family.  One day while processing juice, I decided that while I was having to stay in the kitchen to keep an eye on the canning process, I would work on my 1950s dress.  While I was sewing the darts in the back of the blouse part of the dress and the juice was boiling in the canner, I had this most uncanny feeling of what my Grandma Iva did when in the 1950s and felt a very intense kindred spirit-ship with her.   You see, Grandma canned everything that she grew and sewed almost everything that her 6 daughters wore.  (My Mama has told me of many outfits that her Mom made for her to wear.)  Grandma was so very beyond talented when it came to sewing.  She didn't have money for patterns, so she developed the talent of making her own.  She died when I was 3 so I don't have that many memories of her, but I do have some memories of her...and they are good ones!  I also have many toys that she made for me; a string of large buttons, Barbie dresses made from left over material from my Mom's wedding dress and the dresses of her bridesmaids, and a book that she made for me from pictures that she cut out of catalogs and magazines.  I sure wish she was around so I could visit with her and learn from her.

I have also had a very lovely sense of Patriotism during this week.  Right on time too as Independence Day is coming up and the colors of what I am working on are Red, White and Blue!!  What fun!!


My most favorite pie is a cherry pie.  Whenever we go to a place that has good pie, this is the flavor I get.  With the abundance of cherries that were picked this week, I wanted to make some gallettes, or rustic pies.  I don't like making real pies as there is always so much of it to eat...but gallettes are easy to make and can be frozen for lunches and snacking.  This is the recipe I used for the gallettes: Cooking with Amy and here is the recipe I use for the Pie Crust.  For the filling I used 6 cups of pitted cherries, 1/4 corn starch and 1 cup sugar.  Before baking, I brush the crust with whipped egg white and sprinkle with sugar....mmmmmmmmm so nummy!!!


The inspiration for my 1950s dress...the blue with white polka dot dress....it is so adorable!
Source:  Reminisce

Of course every new era dress needs new undies!  I decided to go with petticoat E from Simplicity 5006.


The pattern I used is very similar to a vintage pattern found on Etsy...


The pattern called for petticoat crinoline and I found it at JoAnn's.  Here is Miss Rosie posing with the very stiff crinoline...isn't she cute?


Finished petticoat.  The pattern called for lace on the upper net layer, but the originals I have seen use ribbon.  I also sewed ribbon on the lower layer as well.  It is a bit flat on Emma, but on me it flares out nicely.
  

Cotton polka dot fabric for the dress and all of my accessories are vintage found at antique stores from around town...this is so fun!!!


What I have accomplished so far.  The bodice and bodice lining are complete and the skirt is sewn together.  The skirt and bodice are just pinned together on Emma as I wanted to see what it would look like.  It fits really nicely!


Closeup...might I just add that I HATE sewing with polka dots this small....it has been super exasperating truing to get those little buggers to line up!!!


Wonderful wavy brim straw hat that I found at Something Special Antique Store...Loooooove it!!!


I had to use some steam to re-energize the flowers as they were a wee bit flat!

Hopefully the rest of the dress will go together easily.  I am debating on wether or not I am brave enough to wear it to the 4th or July parade in town...we shall see if bravery finds me by then!

Have a great weekend my lovely friends!

Be Blessed!

g

Monday, January 20, 2014

Coffee Cream Macarons!!!!

Another Macaron post?  You ask!  Pray tell Why?  You ask!!  Because OHMYGOODGOLLYGOSH!!!  THESE people, are the most fabulousest, most delicious, most mouth watering, most make your tastebuds happy macarons I have EVER TASTED!!!!!!!  I have made three batches, I love them so much!  And I had to share the recipe with those of you who make macarons...because I love you!!!


So incredible with a cup of coffee to cut the sweetness!!!  Glory be!!!

I used this kind of instant coffee....soooooo yummy!!!!  SIGH!!!!
Well, I am off to have another one of these delicacies before I go off to bed!  Don't worry, caffeine does nothing for me!  Sweet dreams my lovely friends!

Blessings!

g

Monday, December 2, 2013

Christmas Season Macarons!

I really must apologize for writing so many posts on my new passion...French Macarons.  But as I said in previous posts, once my OCD bug bites me, it is hard to get over the itch.  To that end, yesterday and today I spent trying out two new recipes.  On Saturday, my Mama is co-hostessing a Christmas Tea at her house and I have volunteered to make some macs for her get together.

Three flavors that I associate with Christmas and Yule Time are Candy Canes, Hot Cocoa, and Eggnog.  Mmmmmm.....

Sitting by a fire, wrapped up in a blanket, reading a nice book and sipping hot chocolate with a candy cane in it while the snow falls gently to the ground is such a lovely image for me!  Therefore, I was ecstatic when I came across this on the internet...

Chocolate Macaron Recipe from The Messy Cook.  I followed the recipe pretty closely, the only deviation being adding a lot of powdered sugar to the filling as it was too runny.  I rolled them in crushed candy cane and took a bite!  

At my taste bud's first encounter, there was a most fabulous burst of peppermint party followed closely by a wonderful, velvety, chocolate, concoction oozing out from between the perfectly crunchy/chewy combination from the shell!  My tongue was under the impression that it had died and gone to pastry heaven and it did not care to return to normalcy!  Needless to say, I will be making this recipe many, many times.

For cuteness, I used the top cover of an antique Christmas Tree Topper to hold the chocolate macs.  What a fun way to package some for a gift!

These pictures were taken at 11:30 last night.  Yes, I actually went to the garage, dug out my Christmas dishes and brought them in for this photo shoot...oh ya...and I made hot cocoa!  Then drank it...

These are so incredibly beyond delicious!!!

Eggnog.  I wait all year for fall to arrive because it brings with it crisp air, beautiful leaves, cooler evenings, pumpkins, apples, canning, Halloween....

and

Eggnog!!!!

Oh I know I can make my own, but it just doesn't taste as good as the store bought stuff.  I usually have to hide it in the fridge or my children will drink the whole carton!!!  So, I was seriously thrilled when I found a recipe for Eggnog macs!!

South Beach has this recipe: Eggnog French Macarons

I made them today and the filling tastes like solid eggnog!!  Seriously!!!  Again, my tongue felt like it had died and gone to heaven!  I could not believe it!  It may have something to do with the fact that the recipe calls for actual eggnog in the ingredients list and nutmeg too.


Eggnog in a glass and Eggnog in a cookie!!  What more could you ask for?


It was a fun change sprinkling nutmet on top of the damp shells!

Mmmmmm....

Last year my Mama bought this reproduction candy tin for me.  I thought it would be fun to put the macs in it and take their picture!!

Wouldn't something like this make a fun gift for a teacher, neighbor or friend!!

Well, I hope if any of you plan on attempting these delicious cookies, try these recipes!  I believe you will not be sorry!!!

Blessings!

g

Friday, November 29, 2013

Blackberry Macarons!

Well, there is something to be said for my OCD...I usually don't rest until I get whatever I am working on right.  This included my making of French Macarons.  Out of the 4 batches Cody and I made Wednesday evening, only 50% of those cookies turned out remotely looking like they should.  Soooooo.....I came home after Thanksgiving dinner last night and did more research.  I learned some things that I am going to be sharing with those of you who wish to make these as well!

Today I made Blackberry Macarons.
As I felt that there would be no recipes for blackberry macs (I have chosen to shorten the word Macaron as I am rather lazy when it comes to writing....) so I googled raspberry macs and found this recipe...


I used the recipe for the cookies that I used for the Pumpkin Macs but omitted the pumpkin spice for these.

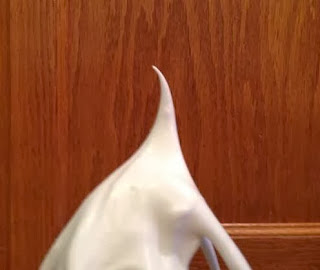
I totally forgot to photograph my meringue step, and for that I apologize (I made some chocolate macarons this evening, Sunday night, and was able to take pics of the meringue...) because the stiffness of the meringue is very important.  As Stephanie from The Joy of Baking demonstrates, after you have whipped the eggs and sugar to what you think is thick, take the whisk attachment off, stir the meringue and then pull it straight up.  If the tip of the meringue stands straight up, you have reached full stiffness.  If it flops over, keep whisking!

See that peak on the top of the meringue?  It is slightly bent over...this is not what you want...

Take the whisk attachment off of the Kitchenaid or whatever you are using, and use it to stir the meringue...then dip it straight up and down into the meringue and pull it out...

If your meringue looks like this, with the peak straight up and down, your meringue is ready!!
For these, I chose to dye the batter purple, totally forgetting that blackberries are not actually purple but a bright red...grrrrrr...actually the end product turned out ok as the contrast between the cookie and filling was quite lovely!


After you have folded your almond/sugar mixture into the mirangue and the batter falls smoothly off your spatula in a nice uninterrupted ribbon, spoon a little dallop of the batter onto a plate.  If it stays "puffy" like above and does not spread a bit,  you need to fold it a little more.  (I learned this little trick from Katherine from The Fashionble Past...)


After a few more folds, re-spoon a dallop of batter.  If it spreads out a bit like above, it is time to fill your pastry bag and start piping!!!


To avoid leakage while filling your pastry bag, twist the bag where it meets the tip and tuck it down into the tip.  This helped greatly.


My handy assistant from Wednesday was not around to hold my bag while I filled it today, so I improvised and stuck it in one of my tall glasses...excellent hands free holding!


I had my son use his compass to draw me some circles on a sheet of parchment.  They are a little over 1" in diameter.  I used this as a guide under the parchment.  Both of the videos I watched on making these cookies suggested this and let me tell you it helped!!!  The knives are there to hold down the parchment that is over the guide, it tends to curl.


Ok, a tip on the "resting" time.  See above how shiny the batter is?  These are freshly piped macs.


After resting 45 minutes (at my house...remember, different places will have different temps and humidity), the macs are now matte, not glossy.  It is time to put them in the oven!


I poked the side of one of the macs to show you how crusty the top of the cookie needs to be.  (Another tip from Stephanie of The Joy of Cooking!)


Huzzah!  Here we have a full tray of non cracked macs!!!  See those lovely legs!  This is what I so wanted to see!  I literally sat on the floor in front of the oven watching the cookies to make sure they didn't crack!


I discovered something today.  The first batch, I put two sheets of macs in the oven.  The macs from the top rack ended up not cooking totally on the bottom and ended up looking like the mac on the right.  The mac on the left was on the cookie sheet on the bottom rack.  This is what the mac needs to look like.  Note to self...one sheet of macs in the oven at a time!!!


Another thing I learned...the top cookie sheet produced a browned mac like the one on the right.  The one on the left was from the cookie sheet on the bottom rack of the oven.  The next batch, I only used one cookie sheet on the bottom rack and put an empty cookie sheet on the rack above.  For some reason, it protected the macs on the bottom from browning...most interesting.  I will be doing that from now on!

I hope my hints will help any of you who decide to make these fabulous macarons!!


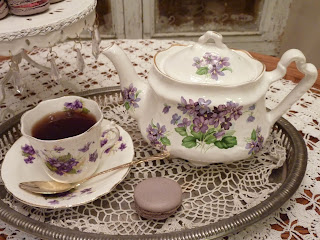
Time for tea and macarons!

Blessings!

g

Thursday, November 28, 2013

My First Attempt at Making French Macarons

Hello lovelies!  I hope that all of my American friends had a most blessed Thanksgiving today!  I had a very wonderful day with my family whom I am so very thankful for!  

I have decided that instead of making another blog for my various baking, cooking and canning adventures that I will, on occasion, share a recipe here!  I actually have three other blogs that I am horrible at keeping up!  So, I'm not going to add another blog to my list of failed blogs.  

For my first entry, I will share my French Macaron adventure!  I blame this adventure on three things:

1.  Katherine Caron-Greig from The Fashionable Past.  She was posting these pictures of macarons that she had been making to Facebook.  Every new post of these fabulous cookies caused me to be more excited than the last post!  I was so very inspired by her as she is a seamstress as well and she could do it!

2.  My Daddy is on a gluten free diet now and I wanted him to be able to enjoy a desert on Thanksgiving.  I chose Pumpkin Macarons so that he could have at least some semblance of pumpking pie on this day!

3.  My cheapness thriftiness..I have had macarons in the past at a pastry shop and paid $1.75 for one...and they didn't even tast that good.  But I love the looks of them!  There's just something very old fashioned about them that makes my Victorian heart happy!  If I can perfect the process, I am so going to be making them!!

So, I began researching Macarons on the internet.  I found some wonderful videos that really helped me out...


These helped me to understand visually how to go about making these cookies.  Then I searched for a recipe that I could make.


I did substitute pumpkin puree for the pumpkin butter and I had no oranges so I didn't add the orange zest.

Macaron Batter piped onto parchment papered cookie sheets resting for 30 minutes

I was very anxious to make these as I had heard how very finicky they can be.  It is a sort of exact science.  My son, Cody ran the meringue part of the process while I ran the dry ingredient part.

Here you can see that most of my cookies cracked.  This, according to the videos, is because I under folded the ingredients.
Cody and I spent 5 hours making 4 batches of cookies.  About half of those cookies turned out good enough to be called Macarons!  You can bet that I will be working a lot on these to get the the way they should look!

Our last batch.  Almost all of our cookies were perfect!!  Success!

Our finished Macarons!  They look perfect and tasted divine!  Just like a pumpkin pie!

 After putting together the last French Macaron cookie, I was filled with a most ridiculous sense of accomplishment!  Like I had just made Macarons for the Queen of England.  Funny, I know, but these little things are so finicky and hard to make that to actually have a bit of success was a bit heady!  I have started a Pinterest page full of different flavors....I can't wait to try one where I can use the blackberries I picked on my parent's farm this fall!  Mmmmm....

Be blessed my friends!  And Happy Thanksgiving!