To all who mourn in Israel, He will give a crown of beauty for ashes, a joyous blessing instead of mourning, festive praise instead of despair. In their righteousness, they will be like great oaks that the LORD has planted for his own glory. Isaiah 61:3
Showing posts with label 1850s. Show all posts

Sunday, October 22, 2017

1850s Wedding Dress!


Good Sunday evening to you all!  I hope this week was a fabulous one for you!  For me, I finally got around to feeling like tackling my next project...a half mourning, late 1860s, elliptical gown!  I am almost done with the petticoat so Huzzah!

Today's post is about the last of the wedding dresses I made for the Dressing The Historical Bride program.  And it ties with my favorite for first place.  I don't know why this one makes me so happy, it just does!  The fringe would have put it in dead last just last year, but I think since I made the fringe out of the fabric itself, it didn't look so "fake".  Don't know what that means, but there ya go.

The dress was made out of 70/30 cotton poly and is a beautiful moire!!  I adore moire and think it's interesting that both of my first 1850s gowns happen to made out of moire (MET Moire Mourning Dress).  I know that I should have used a lighter weighing fabric, but when Mama made her 50th Wedding Anniversary Party Dress there was a ton left over.  She let me have it and there was almost enough to make this dress! I do not what we were thinking, buying so much.  Like I have said before, math is not my strong suit and so it is the norm for me to buy too much fabric, but this was ridiculous! Anyway, the skirt of this dress alone weighed 8 pounds!  So note to self, when next making a flounced 1850s dress, use a sheer fabric!  hahahahahahaha!!

I just loved how this dress turned out and now I am wanting to make a ball gown in the future!  Out of lighter weight fabric...


The Dress


A word to the wise...if you plan on making a flounced dress, please decide that you want fringe BEFORE you sew the flounces to the underskirt!  I decided AFTER I sewed all the flounces on that the skirt would look better with fringe.  Grrrrrrrrrrrr...


The pattern called for a pointed back bodice, but I had so much trouble with it laying flat, that I decided to do a straight across the waist back.


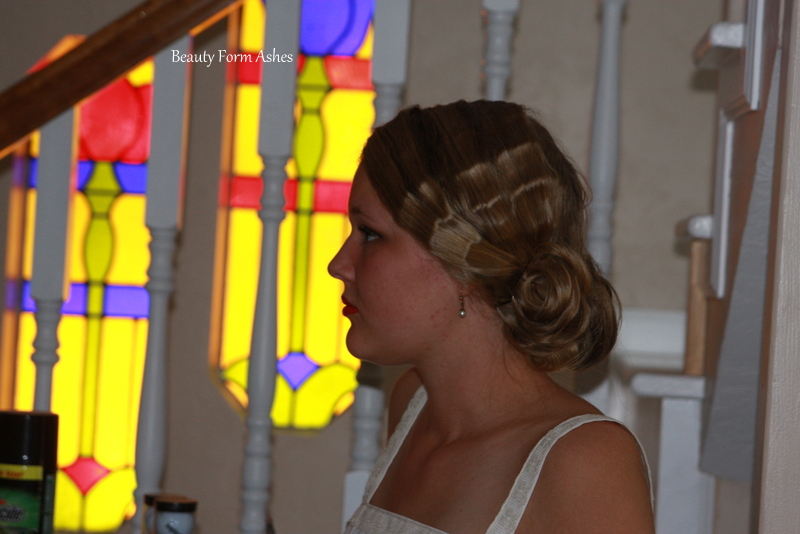
I love the long point on this dress and the way the seams work together to give the illusion of a super long "V".  I borrowed Mom's faux wax orange blossom corsage for the decoration on the dress.  I though it looked fantastic!


Hand fringed self fabric fringe actually makes me happy.  I think the world is going to end tomorrow.  hahahahaha!  Just kidding!


The Inspirations


I spent a long while searching for an 1850s wedding dress to use as inspiration.  The one below from the V&A Museum totally made my heart happy and was going to make the whole outfit similar to the original dress.  However, I had never used the pattern I purchased to make the bodice and so was really stressing out over it, even though I intended on making a mock up.  Perhaps one day I will make a bodice similar to it!


1857 Wedding Dress.  Source:  V&A Museum


After I decided against making a long sleeved bodice, I had to go on the hunt to find a short sleeved bodice.  Happily I came across this fabulous example from Kerry Taylor Auctions (Sold December 3rd, 2013.  Lot #45) Thank you Kate for permission to share the image of this fabulous dress!  
You can see more images of the dress Here.


Wanting to make sure that short sleeved bodices were used in weddings in the 1850s, I also searched for photographs from the era and found many.  Below are a couple.  Such beautiful brides!!


"Martha Pickman Rogers in her wedding gown"

Source:  mfa Boston


Source:  Skinner Auctions


In Progress

One of the most time consuming parts of this project was the making of the fringe.  Below you can see how I did it.  I laid the fabric on the floor, put heavy books down on it to hold it down and started pulling the weft threads, sometimes two at a time!  And yes, it was also a messy business!


Each strip, and I had to make 10 strips of over 5 yards, took over an hour to "pull".  I spent a lot of time on the floor!


Other tools used were a seam ripper to start the threads to be pulled and a comb to comb the fringe when it got knotted up.


A short video on how simple it is to make your own fringe!


All the fringe rolled up on a fabric tube. 


Bertha before being trimmed with ruffles and fringe


The Pattern


This pattern was a fabulous one to use.  I will most certainly be using it again!!


Well, I'm off to bed!  I hope that you all have a most wonderful week!

Blessings!

g


Wednesday, September 20, 2017

The "Dressing The Historical Bride Program"!!!


Warning: Picture heavy post!


Hello everyone!!!  I hope that this post finds you all more than well!!

Oh my goodness!  I can't believe that it has been over 2 months since I have written a blog post!  EEEEEK!!!  So much has happened in these past two months, so I think I'll forgive myself this sore neglect of blog posting...

I'll write more on that maybe in the future, but for now, I'd like to share with you the "Dressing The Historical Bride" program that We Wear History and The House of Whyte put on two Saturdays ago!  We Wear History and Something Special Antique Store in Meridian, Idaho, do a High Tea/Fashion Show yearly in September and this year's theme was Dressing the Historical Bride.  Not only was it an underwear education program, but also a fun historical walk through bridal wear from 5 fashion eras.  Those eras that were showcased were the 1830s, the 1850s, the 1890s, 1914 and the 1920s!  I had such a fun time researching all the dresses, veils and accessories for this program, but need to schedule my sewing time a lot more carefully!  There were days that I was sewing more that 12 hours a day.  Lately my creative mind has been writing checks that my body and the whole space time continuum thing simply cannot cash!  So, there will be lots of work going on in that arena in the future!

  We had so much fun this year as the ladies are so delightful, elegant, fun, funny and just a true blessing to work with!  We added two new ladies to our "family" this year, Michaela Coy from My Soul is Fed With Needle and Thread and Connie Smith all the way from Texas!!! (Connie is my bestie from Texas, Josie Smith of Josephine Gypsy)

Photos were taken by the talented Colton White (my boy!) and the floral arrangements from 1850s, 1914 and 1920s, were made by my sweet Mama who couldn't be there as she had scheduled knee replacement surgery two days before...(due to some horrid unforseen events, she doesn't have a new knee but does have in and on her tibia 2 plates, 19 screws, 4 wires and 148 staples...yaaaaaaa...more on that later!)

Sooooooo...without further ado, here are the historical brides in their finery!


1836

Miss Molly Palm


1856

Miss Brianna Walker


1898

Miss Mikayla Walker


1914

Miss Aubrielle Holly


1926

Miss Adalea Sparks


My Lovely Brides and Their Dressers!

What is an underwear/bridal fashion show without those lovely ladies who dress the brides?  Here are the fabulous dressers with the brides they were tasked with making ready for the walk down the aisle!


Miss Molly Palm and her real life Mama Mrs. Laura Palm!


Miss Brianna Walker with Mrs. Sarah Mace (who is also Miss Molly's real life aunt and Laura's sister!)


Miss Mikayla Walker (who is Miss Brianna's identical twin sister!) and Mrs. Connie Smith!


Miss Aubrielle Holly with her real life Mama, Mrs. Marilyn Holly!


Miss Adalea Sparks with Miss Michaela Coy!


I may be a bit partial and prejudiced, but I think that these lovely ladies were just stunning!  (They are stunning out of costume as well!)  It was such a thrill seeing them all dressed up!!!


 Every Bride needs an escort to walk them down the aisle!

I have the most fabulous men in my life!  My husband, Greg and my sons, Cody and Colton were so accommodating and agreed to act as tea pot fillers and escorts for the brides during the show!  I was so proud of them!  They also helped to deliver ALL the everything to the venue and take everything home.  I am so blessed!!

(these next 5 pictures were taken by my long time bestie Kay Dyer!)


Miss Molly with Mr. Greg White


Miss Brianna with Mr. Colton White


Miss Mikayla with Mr. Dakota White


Miss Aubrielle with Mr. Greg White


 Miss Adalea with Mr. Colton White


To end with, here are some behind the scenes images of the day.  


I hope that you have enjoyed these photos as much as I do!  They make me so happy!!!  I'll be writing three posts on the newest bridal dresses I made along with posts on the underwear that was made for them in the future...hopefully NOT two months not away!  hahahahah!!!

Be blessed my friends!

g