
Let's begin wiring shall we? Hopefully I can make my thinkings understandable. According to my husband and children that is an impossibility! But, I shall try anyway! Oh yes, I would like to warn you that the pictures that I will be using do not all belong to the same hat.....

Start out with a nice rayon covered millinery wire. I purchase my wire from Judith M. Millinery.
The gauge of wire I most generally use is 18. It is nice and thick and easy to work with. A while ago my dear friend, Josie, gave me some of her wire and I believe it is a 19 gauge. A bit smaller (remember, the lower the number, the thicker the wire) but it still works wonderfully for these hats.

I start out every hat with this base. It looks like the spokes of a bicycle wheel or spider web. I just cut the wire into 5 long lengths and straighten them out. My first hat I twisted the starter wires together in the middle but since then, I have sewn them together at the center. Makes for less bulk. Make sure the wires are equidistant apart as this is the base on which your hat will be built.

Here you can see the shape of the spokes. I knew that the wires on the bonnet would be longer going up to the top of the bonnet and shorter for the bottom. I am sorry that I don't have a pattern as most of these hats are just eyeballed. I just picture in my mind the shape I want the hat to be and cut the wire longer that I think I will need. Don't worry about wasting wire as you will use the pieces you cut off later in the hat.

The next step is to make the circles that will form the shape of the crown. This is an easy part as the coil of wire is already in a circular shape! Usually, I make three circle rings (or an oval one if the hat is going to be oval) in increasing sizes, about an inch to an 1 1/4". Then I sew the overlapping ends together. I like to have a lot of overlap as it makes the circle very secure.

After making all of the circles, I sew them to the spokes, eyeballing the center of the spokes to the center of the circle.

Here is a view of the stitching I use. I call it a figure 8. Not sure if that is an official stitch, but it makes sure the wires don't slip. It helps that the wire is covered with its own thread!

Another view of my figure 8 stitching. It is a bit ugly, but thankfully it will be covered!

Here is a top view of the circles or ovals in this case. I have 3 ovals of increasing size that make up the top of this hat. The outer most oval being the edge of the brim.

This is the base for my first bonnet. See how the brim top is longer than the bottom? Just keep in mind when you are cutting and connecting your "spoke" wires how you are wanting your hat to look. A perfectly round hat is going to have spokes that are the same length. A bonnet will look like a ball of dough that has been sitting too long on the counter.

Ok, so next step. Depending on your hat, you will do different things for the crown. For a bonnet, I make a "soft bend". That is, I just softly bend the wire over so that it looks rounded.

For this hat, I bent the wire at the outer top circle of the top of the crown to a 90 degree angle. For support on the sides of the crown, I made more circles and sewed them to the "spokes" that are now perpendicular to the tip of the crown.
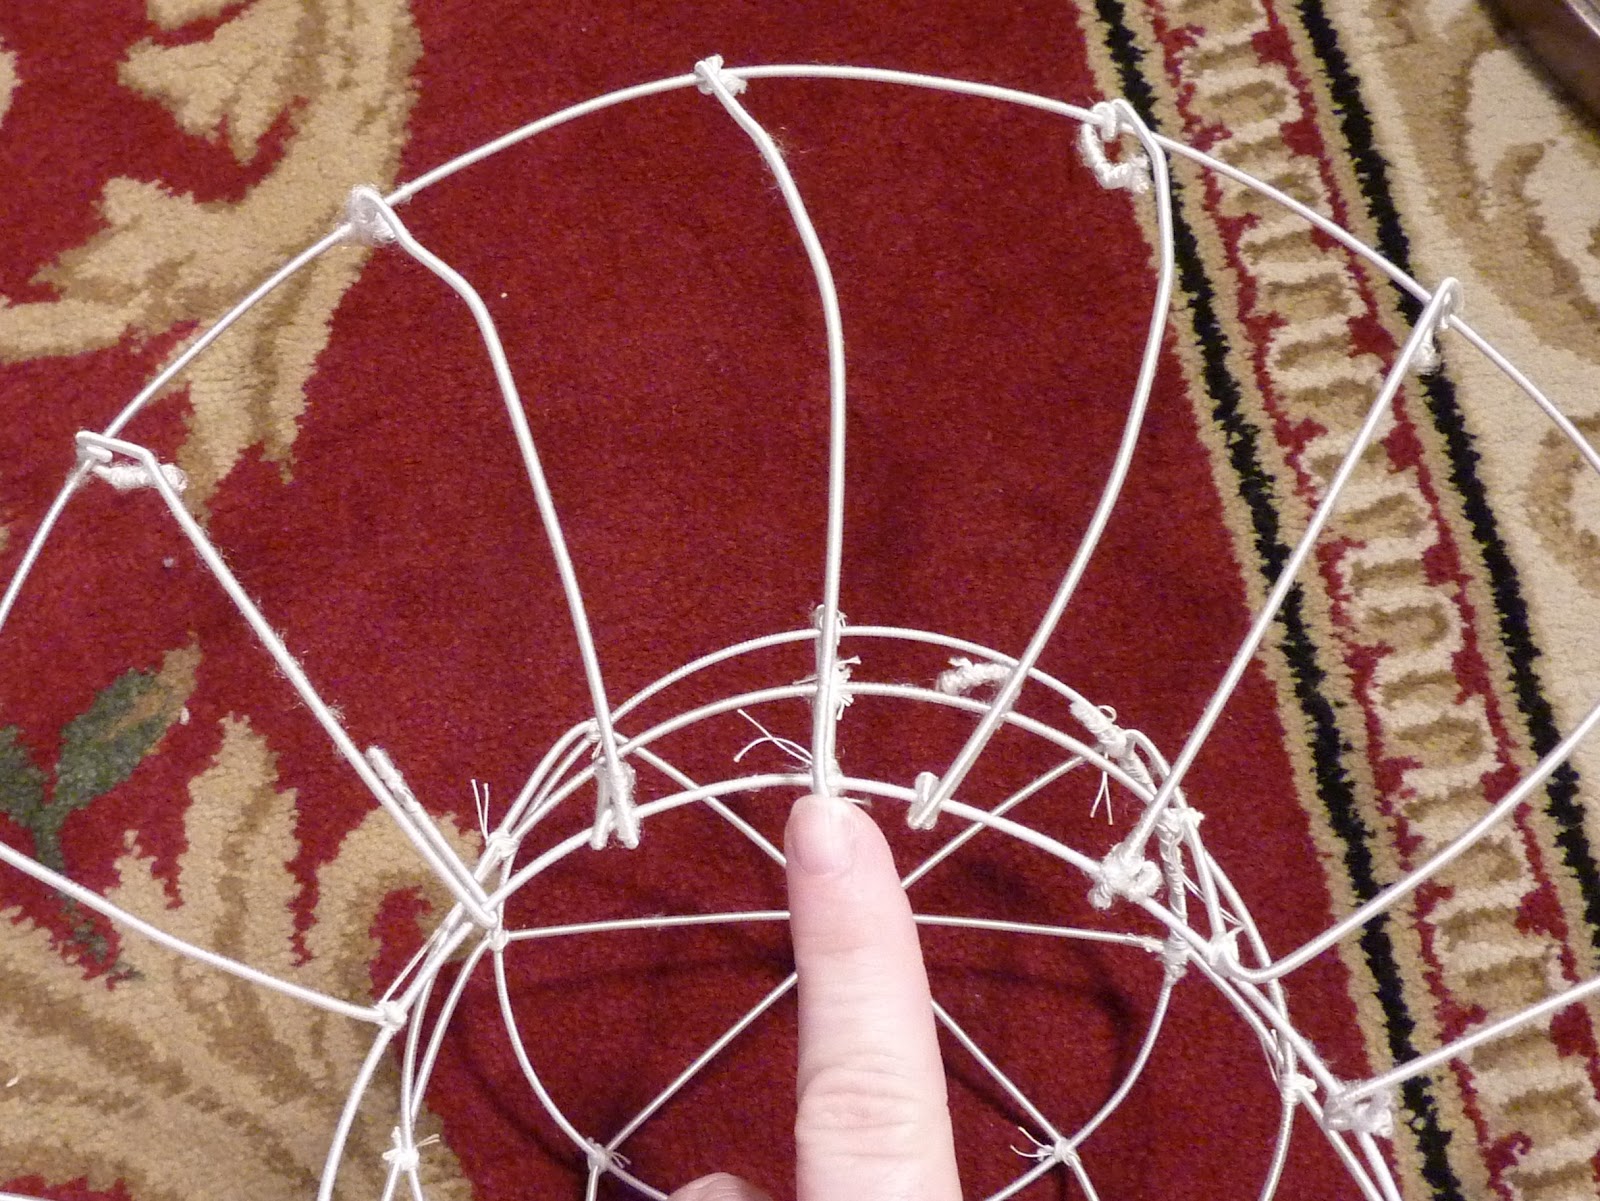
At the base of this hat I bent the "spoke" wires at a soft 90 degrees (sort of rounded them) and sewed on another circle. Where my finger is, is an original spoke....

Figure out how wide you want your brim at this point. Create a circle or oval that will be the edge of the brim. Place it on top of the "spokes". Cut the "spokes" 1" on the outside of the circle. Then twist the spoke around the outer edge wire tightening it with needle nosed pliers.

For this hat, the brim was so big that the original spokes were too far apart. I used the ends of the spokes that I cut off to make supporter spokes. You see the supporter spokes where my thumb and index finger are. I used the twisting that I used to attach the outer brim circle to the spokes to affix the supporter spokes.

Depending on your hat, you may want to add more circles or ovals to the brim of your hat. Here, there are 3 circles including the outer most brim oval. This hat has:
4 spoke wires
3 crown ovals
2 crown side ovals
3 brim ovals
Now you have your base for your wire framed hat! I hope that my directions are clearer than mud!
Awesome tutorial thank you :)
ReplyDeleteOh Liann! Thank you so much! I never know if what I am trying to say makes sense! You have made my day!
ReplyDeleteThis is similar to the bonnet Elizabeth Bennet wore in the 1995 P&P. Would you make one for me? My email is wises496@gmail.com
ReplyDeleteHello Bonny! The premise is very much like the wedding bonnet Lizzy wore in P&P and I was going to be making one for me in the future! I will email you and we can start a conversation!
ReplyDeleteBlessings!
g
wondering if you will have a tutorial on Covering the frame anytime soon
ReplyDeletethanks
Hello Cometkatt!
DeleteThere are three more posts, Part 5, Part 6a and Part 6b that cover the Covering of the frames...just click on the "Newer Post" at the bottom of this page and it will take you to Part 5...
Thank you for asking about the covering tutorials!!
Blessings!
g