Quite a bit of planning and research went into the hat that I wanted to go with my 1884 Military style bustle dress. I knew I didn't want your normal flowerpot hat...not that I don't adore those hats, I do. But this dress is sort of an over the top style. It has a lot of trim and the style is not your normal every day, "go-to-tea-and-eat-crumpets" dress. To me it is very "I-am-the-Captainess-of-a-fabulous-ship" dress. It needed a cool hat. I sort of struggled with the size that the hat would be as many of the flowerpots from the 1880 bustle era were on the smaller size, then I came across some images from my good friend Beth Carson. Two of them are from the beginning of the second bustle era and the last one is from towards the end of the second bustle era. All three show examples of big hats! Huzzah!!!
1883...both ladies are wearing larger hats! Yeah!!
1883...A lovely hat with a wide up-turned brim! Yeah!
1887...now that hat on the right!!! THAT is a HUGE hat for this year!!! Huzzah!!! So now I have evidence that hats were at least visualized this big if not actually worn this big. I'm fine with this!!
Next comes what I am wanting to achieve. I came across this lovely photograph while pinning images to my "Military Inspiration" board on Pinterest. It was pinned from G. D. Falksen who in turn got it off the NYPL
(New York Public Library Digital Gallery) site. This is the beautiful Maude Adamsas L'Aiglon (the nickname of Napoleon II of France, meaning Eaglet).
Another great image of Maude Adams. Again as L'Aiglon. This image is from Emory University and shows Maude again wearing a military bi-corn! See how big it is? It is so fabulous!!!!!
Well, as happiness would have it, a long while ago, I was able to acquire my very own antique bi-corn hat from my local antiques store!! Something Special antiques store had this little gem hidden away in the upstairs hat room and it was on sale on sale...like for $10.00! So I bought it. The green and white feathers are not original as I sewed them on when I got the hat home. I am pretty sure it is some sort of Mason's regalia hat or from another organization, but it is still very militaristic!! And would make a perfect pattern for my hat!
Inside of my hat...
This hat was a bit small for my HUGE head so I decided to enlarge it for me. I measured both front to back...
...and side to side...
Then I folded a piece of computer paper in quarters. I took the measurements that I got from the original hat and added about an inch to that. I then measured that to the piece of quartered paper. I soon discovered that it was waaaaay too big so I whittled it down a bit.
Next, I took a piece of large card stock paper and folding one of the flaps of the original hat down, traced around it. I traced one side (the left pen tracing on the paper) then flipped it over and traced the other side.
Again, wanting the hat to be a bit bigger as it was also small looking over all on my HUGE head, I added an inch to the outside of the brim. I eyeballed where the inside hole would be and traced that. This would be a mock up before I cut into my expensive buckram. I also drew an inch inside of the hole for the tabs that would be sewn to the crown sides.
Of course I didn't take pictures of my next steps because I am a dork, but I did make a card stock crown side and crown top. I then taped the whole thing together and checked correct fit. It was too big so I whittled the crown top, crown side, brim opening and brim edge down a bit more and taped it all together again. This time it was a much better fit!
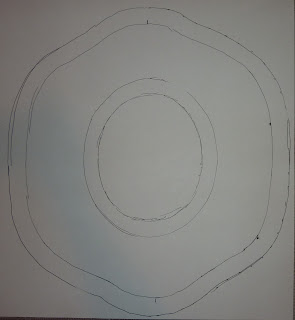
I took the card stock pattern pieces apart, and re-worked the brim as it wasn't exactly symmetrical as it was just a rough tracing from the original. I folded it in quarters and cut one of the quarters out. I taped 4 pieces of computer paper together and using the edges of the papers as a guide, I traced the quarter of the pattern on the paper to get the above pattern. I hope that makes sense!!!
All the buckram pieces awaiting wiring! When making hats, I wire around the edge of the brim, the edge of the crown top, and one side of the crown side.
I wanted the top of the hat to be rounded, not just flat, so I glued two layers of a thick batting to the top. I used scissors to mold the batting so it didn't have a 90% angle.
Yeah! A nicely rounded top! Don't know exactly why I did it as when I finished with the hat and added my feathers, you couldn't see the tip of the actual hat. But I know it's there and it makes me happy!!!
Up next? My finished hat!!!


Just amazing!! You are such an inspiration!
ReplyDeleteThank you so much my wonderful friend!!! You make my heart happy!!!
Deleteps...I deleted the above comment as it was a duplicate of this one....unless you felt the need to say that twice! ;-*
Thanks for sharing the manufacturing of military hats. This article is certainly very informative. Actually one of my uncle is into this business. And he is been very successful from many years. I have observed that he got a large collection of military accessories.
ReplyDeleteYou are most welcome James! I am happy you enjoyed this post! Your Uncle's business sounds very fascinating if this is what he collects! I think military accessories are very fascinating!
ReplyDeleteBlessings!
g