I got a lot done today by way of trim for the Merlot suit. First off was buttons. The original has really cool two toned self covered buttons. The color of the trim in the center and the color of the suit on the outside. I pondered at great length as to how I would accomplish this feat of button engineering and came up with a solution that I think will work.
The buttons on the original. I am sure that the makers of these buttons had some fabulous machine to make them look this awesome. I just have my hands, a pair of scissors and the self covering buttons from JoAnn's.
First off, I cut small pieces of the twill trim and glued them to the top of the button.
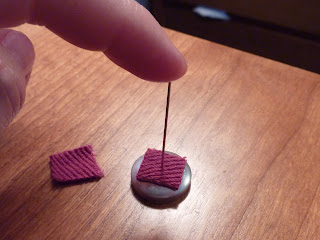
I took a straight pin and marked where the very center of the button was.
If you look real close, you can see the minuscule whole the pin made. I cut a whole in the center of a piece of the wool, then glued all the way around it, making sure the get very close to the inner edge.
Very carefully, I laid the wool over the twill and waited patiently for the glue to dry ALL THE WAY. I am not kidding in the least when I say I waited for the glue to dry all the way. Well, at lease I did on the second button I made....
Because this is what happens when the glue is not dry all the way. The wool, which just so happens to be a tad bit stretchy, gapes wide open at the whole! Super!
After completely dry, I used two of the button covering methods. This first try I used the above kit. The button mold on the left, where the button is now placed was the actual size that came with the 5/8" buttons. Unfortunately, it was too small a fit for the wool covered button and started the whole stretching process, even though it was completely dry.
I used the mold that was the next size up and it worked just fine.
This method is the one where the button top has the teeth all the way around the under side and you use a hammer to pound the bottom onto the top....
Place covered and "toothed" button on the mold. Cover the button with the bottom part.
Here you can see the "sticky up" part of the thing I am holding...WOW great terminology, but I can't think of better words. That part fits into the groove of the button bottom.
Like so.
The the part that you hammer goes on top of the big round thing!! hahahahahaha!!! Sorry! Then you hammer the pieces together!!
The final buttons....They look different sizes here, but they aren't...weird.
So, there you have it! Two tone, self covered buttons!! Laaaaaaaa!!!


No comments:
Post a Comment