To all who mourn in Israel, He will give a crown of beauty for ashes, a joyous blessing instead of mourning, festive praise instead of despair. In their righteousness, they will be like great oaks that the LORD has planted for his own glory. Isaiah 61:3
Showing posts with label hat. Show all posts

Sunday, April 2, 2017

Wearing History's "1930s Gina Dress"


Good Sunday to you all!  I hope you have been having a great end of March/first of April!  We here in Idaho have been enjoying our usual "if you don't like the weather in Idaho, wait 15 minutes" weather.  I do love this about our change of seasons.  At least the Spring/Autumn times.  During winter, you can depend on bitter cold.  During summer, you can depend on disgusting heat.  But in the autumn and especially the spring, it is fun to see what will happen "tomorrow".  Personally I have been super busy doing life things and working on a wonderful somewhat new to me era!!  Here's the story.

About two years ago (at least I think it was that long ago...) when I was in my "let's do all the 1930s, 40s and 50s things!!!" mode, I was at Antique World Mall when I came across the most beautiful pattern I had ever seen.  This includes all of my 1950s sailor dress patterns, even my few Victorian-1916 patterns. Why?  Because of the blue floral print dress.  My heart was lost utterly and completely to this era.  (Great!!!  Like I need another era to have my heart be lost to!!!!)  I think I was just at this point searching for inspiration into this era and hoping that I would be able to find some patterns in my size...both body wise as well as wallet size.  One of my favorite booths offered up the pattern that would change my mind when it comes to the 1930s...that is until I made the 1930s Fall Suit.  But I digress...

Giddy with delight, I photographed it with my phone and went to the one spot in the store that gets internet reception and Facebook messaged it to Lauren of Wearing History.  I think I jokingly asked her if she would size it up for me as the bust size is 32" (if I didn't actually ask her that, I am pretty sure I was thinking it.  When you get "old", memories that are over a week old, begin to get fuzzy.)  Being that I have an ENORMOUS rib cage, there wasn't a snowball's chance that this would fit and I don't even know where to begin sizing patterns up.  Almost immediately I got a response from Lauren and I am pretty sure she was as giddy as I was with the beautiful pattern.  During the course of our furious messaging back and forth, it was decided that I would send her the pattern and she would work her magic and create a multi-sized pattern for all to enjoy!!  I was thrilled!  And to be perfectly honest with you, my thrilled-ness was totally selfish, because that meant that IIIIIIIII would totally benefit from this idea!!  But, yes, I was also thrilled that Lauren would be making a new pattern to sell and others who love vintage dressing and sewing would benefit from the new pattern!  Win Win for us all!!

Well, things over the year happened, like the back yoke piece not being in the pattern and the search for one commencing , and ooooooh a most beautiful, joyful, longed for and loved baby being born and the events that go along with that and the pattern took a while to get sized up.  Lauren kept apologizing that she hadn't gotten to the pattern.  I was totally fine with that as I realize that being pregnant and having a baby totally take precedence over pattern making and I was in no way in any hurry!!!  But recently (see?  I can't even remember when the flurry of hurridness started!)  Lauren informed me that the pattern was being printed and would I like to be a pattern tester?  Well, again perfect honesty here, I hadn't been too impressed with how the Orange Fall Suit fit and I didn't like how I looked in it and "would I really ever use a 1930s dress in a fashion show?" and do I even want to fuss over this "vintage" era as it's not antique?  All these thoughts went through my mind as I slept on her question.  Finally I decided that yes, I would be a pattern tester.  After all, she had been worried that I would be upset if the pattern didn't come out in time etc, so how could I NOT be a tester!!??  See?  I can totally be a selfish snot.

Finally the pattern came and the name of it was "1930s Gina Dress".  Lauren had asked me my opinion on naming the dress and I said I had no idea and that I trusted her to name it.  I can't remember if she told me what it would be, or maybe I forgot what she had said in the hurry and hustle of daily life, but when I was holding the pattern in my hand and saw what the name was, my heart constricted and I got a flush of happiness, humility, unbelief, awe and a huge dorky smile spread over my face and my eyes misted over!  What a great honor to have this pattern named after me!  (Thank you so much Lauren!!!)

I got right to work on the mock up using some horrible fabric that was scratchy and gross, but as the shape began to take shape, I got more than excited.  How had I missed the awesomeness of this era?  Perhaps it was the using of a pattern that wasn't an actual vintage one, I don't know.  In any case, I hit AAAALLLLL of the quilt shops in town looking for a similar fabric to the one shown on the pattern.  Finally I found a fat quarter of THE PERFECT FABRIC at a store called Crafter's Warehouse.  Of course they had sold out of the fabric and wouldn't be getting any in.  I then re-visited AAAAALLLLLL of the quilt stores in town and nope.  Not a one of the stores had my fabric.  So to the internet I went.  Happily Hancock's of Paduca had some!  I ordered it and anxiously waited until it came.  Theeeeen I had to order a soft hand cotton organdy.  That too took "forever"!!!  (I so totally need a worm hole!!)  But both came and I got to work!!!

Below is my version of Wearing History's newest pattern!


The Dress


My version and the original.  I am wanting to do a photo shoot at the Boise Depot as it would be a perfect fit.  The Depot was made in the 1920s so would be perfect for a dress that was fashioned after the fashion of the 1930s!


The pattern.  When I sent it to Lauren, I didn't think I would see it again.  I messaged Lauren and asked if I could have a photo copy of it and she informed me that she would be sending it back!!!  I was so ecstatic about that!! 


 A fun still life.  Original pattern, vintage buttons and belt buckle found at my other favorite antique store (Something Special in Meridian), the new pattern and my fabric!

You can order you pattern from Wearing History.


Emma wearing my new dress.  Poor thing needs to gain some weight!!!


I so love the front of the top!  The gathering into the yoke is so sweet!


The buttons aren't that interesting like a lot of the 1930s buttons were, but the "watery red" of them matched the buckle perfectly!


I rushed to Something Special knowing they would have the perfect buckle and sure enough, an oval, red buckle was waiting just for me!


Hand sewn rolled hems!  I don't think they are too awful for my first attempt!


The sweet ruffles on this dress make it so girly and fun!


Awesome kick pleat at front and back!  Everything about this dress is so cool!


The Hat and Accessories

I had a booger of a time trying to find a hat that would be similar to the one on the pattern, but short of a divine miracle, I am pretty sure one will never present itself.  The blue of the fabric, well it's a really odd blue.  Not navy, not baby, not sky, not periwinkle, not teal...Every hat I found that I held up to it was just off.  And not just off, but make your eyeballs bleed off!!  I decided that instead of having the shoes and hat be blue (I had the same issue with shoes) I would just use red for all the accessories.

Enter the thrift store straw hat.


This is what my 1930s fedora style hat started life out as.  A 1990s summer hat.  It is made of the most wonderful straw that totally does what you ask it to!  I don't know the name of it, but every time I see one of these in a thrift store, yard sale or estate sale, I get it because I know that I'll be able to reshape it into what I am "needing".


The inspiration for my new hat is an original.  I do have some lovely wool that matches it almost perfectly that I'll use for something 30s, but for now it played the perfect model!


The red gloves and both bracelets are vintage.  Not sure exactly how old they are, but will work nicely with the dress!  The shoes...the shoes.  These proved to be a bit problematic.  Until I am sure that I truly love this era (like will I wear it on a regular basis outside of costuming?) I don't want to invest in an expensive pair of shoes.  Until I decide on that matter, these shoes from a thrift store will work just fine.  They have a very vintage flair and the color was red!  Not sure exactly when peep toes came onto the shoe scene, but again until I can afford some Miss L Fire shoes, these are going to be it!  Also, my feet HATE HATE HATE heels...so there is that.


The platforms of this shoe are also not era correct, but aren't they so cute?


The pearl bracelet belonged to my Great-Grandma Nonni!!


Firsts For Me!

This era and pattern offered an opportunity for me to grow sewing wise which always makes me happy!  Especially if there is a YouTube tutorial I can watch several times!


Rolled Hems.  How I hate thee!  I could totally write a sonnet about my hatred for these hems, but I'm too tired to, so just believe me when I say, that I hate them.  I did find a lovely YouTube video that really helped me...along with having lovely cotton organdy that didn't ravel much!


Rolled Hem tutorial that totally helped me.  The tips of my fingers are so fat and calloused from sewing that doing small work like this is very difficult.  But after several hours, my hems were completed!


Bound button holes.  Ok, the very thought of these filled me with dread and I had made up my mind that I wouldn't be making them for this dress.  But after much agonizing about them, I decided to make them...then the real agonizing about doing them began!!  Again, YouTube tutorials came to my rescue.  After watching several that seemed way to much like welt pockets, I discovered this one...


This two piece bound button hole tutorial totally worked for me!!


The last first was a lap closure!  At first I didn't see how it would work, but after I started working on it, it became clear and totally worked and lays flat so very nicely!!


First Wearing


As I said above, I am wanting to do a proper photo shoot of the dress, but couldn't resist putting it on along with the accessories and some lipstick!  I am going to have to do some research and make sure the hat of correct proportions but for right now, I'm really happy with how everything turned out!

About the pattern... Lauren as always did a magnificent job with resizing the pattern.  This being my second time making a 1930s outfit, I am quite thrilled with how easily this went together.  Where there are questions about things, Lauren has added WH (Wearing History) notes to help with modern day understandings.  The fit is perfect (I used the size 40 bust for the top and the size 38 bust for the skirt) but ya, the fit is excellent!  I made this blouse using the Tea at Two and that pattern too was most excellent!  If I could, I would own every Wearing History pattern because they are just that fabulous!!

Thank you so much Lauren for making this pattern possible for ladies like me who are not a size 32 bust!  You are such a patterning rock star!!!

I hope you all have a most wonderful week and I'll chat with you later!

Be Blessed!

g 

Friday, July 29, 2016

Mama's 1898 Hat and the Beginnings of Her Bodice!


Good Friday to you all!  I hope you all are having a great start to your weekend, and I hope all of my costuming friends who are currently at Costume College are having a blast!!  I soooooooo cannot wait to see all the pictures of all of your wonderful outfits!

As I am in a holding pattern with my dress, I have started on my portion of Mama's "Mother of the Bride" dress.  She is making her skirt, I am making her bodice and have completed her chapeaux!  I am so very giddy with delight with Mom's dress and the fabric that was found on eBay!  There is quite a bit left, so I may have to swipe if from her and make something for me!  Bwahahahahaha....

Below are images of her new hat.  I have had the faaaabulous feathers for years and we used them as ball/evening gown hair adornment for many events, but the call to use them for this hat was very strong.  I had found a 1950/60s hat at an antique store a while back that was covered with the exact same color blue as the fabric for Mom's dress so it was dismantled for this 1890s hat.  I also had in my stash a blue ribbon in the same color family, but a wee bit darker.  It was left over from when I made the first round of Royal Family Orders back in 2014.  (See?  My vow to become a tidy hoarder is paying off already!!)  The vintage straw hat was also in my stash and just needed a new steaming and shaping on the brim.  Voila!  Mother of the Bride hat was born!!!  

Inspiration for the hat came from several sources.  The ribbon treatment came from Charmaine Zoe's Marvelous Melange flickr account.  I loved how the ribbon was softly folded on itself over and over again.  So, I went ahead and did just that!


A reminder of the inspiration for Mom's dress.  Instead of the 5 rows of lace on the skirt, we are doing only 3.  As mom says, "If I do all 5 rows, that top row will reach my arm pits!"  hahahahahahaha!!!  Ok, here's the inside joke...Mom is only 5' 2"!  Soooooo....only 3 rows it will be!  Oh, and I did a reversal of colors on the hat, because Mom said (and I quote), "Are you going to put those stupid orange colored flowers on my hat?"  She doesn't much like orange.  Like, not at all and blue is her favorite color.  So as to please Mama, blue flowers it was!


I LOVED all the blue carnations that were on the vintage hat!  There were so very many!


Sweet ruffled, tipped up back!  That was a very long process to do, but I think it was worth it!


Those feathers make me so happy!


I love using true vintage silk flowers.  They are soft and flow-y and not hard like our modern made flowers....


The beginning of the bodice.

Mom and I went to JoAnn's yesterday to find some lovely lace to do the yoke and lower sleeves and were rewarded with just what we were looking for!


I so cannot wait to see this on my Mama!!!


This is some of the nicest lace I have ever seen at JoAnn's.  It looks very much like Chantilly lace.  It is a very soft white overlaid onto an ivory matte satin. 


For the collar, belt and bows, we found a nice bridal weight satin with a wee bit of shine!


The two dresses chatting away in my room!  I can't wait for them to be worn!!

For the torso part of Mom's bodice, I'm altering Butterick 5970 to make it less Edwardian and more 1898!

Ok, now to wait for Mom to come for a fitting tomorrow.  Let's hope all goes well!  I hope you all have a wonderful weekend my friends!

Be Blessed!

g

Thursday, January 14, 2016

TBT: The "ie" Picnic Dresses!


Once upon a time, not so long ago, there were wonderful plans for the beginning of this 2016 year.  An elliptical 1860s hoop to be covered with a raspberry silk dress.  Lots of new and fun vintage era dresses...  But those plans were put on the back burner with the call from a friend in December asking me to do the costuming for the Spring Musical at NNU.  (I am so very excited about this by the way!!!)  All personal sewing will have to be taken back up in the middle of March, so until then, I will be re-instating Throw Back Thursday posts highlighting sewing projects that were made and completed before I started Beauty from Ashes!!

Around 5 years ago I believe... I was at JoAnn's and came across a bolt of this most delicious pale, pale pink silk.  It was on sale for $8.00 a yard and I took the bolt up to the cutting counter to get 3 yards cut.  I was shocked to the very tip of my toes and my eyebrows rose to my hair line when the lady attending me informed me that the silk (oh, did I mention that it was also 58" wide?) was a mere $2.00 a yard.  TWO DOLLARS A YARD!!!!!!!  After recovering from my utter shock, I informed the lady cutting my fabric that I would take ALL the silk.  14 yards later, I walked out of JoAnn's with a most ridiculous grin on my face.  I think I was walking on clouds!!

I took my frothy bunch of girly, pale pink silk home, and as I sat petting it and talking lovingly to it an idea came to me.  I had enough silk sitting on my bed to make dresses for my three nieces and myself!  What fun!!  

My nieces' names are Gracie, Lizzie, Hallie and I am Auntie to them.  When we are all together, we are the "ie" girls!  As I sat petting the silk, the idea of making dresses for a Victorian Picnic kept playing through my mind, hence the names of these dresses "The ie Picnic Dresses".  Wouldn't it be so fun to take the girls to the Idaho Botanical Gardens, with hampers full of food, fine china plates and crystal goblets, sitting on antique quilts spread on the grass among the spring flowers!?  Well...the picnic didn't happen, but the dresses did get made.  We ended up going to Miss Tammy's Tea House and had a delicious brunch (I had a Monte Cristo!!)  It was a fabulous oh-so girly day!!


Photo Shoot at Nana's House

We all met at Mom's house to get dressed for our Victorian day and for our photo shoot.


Aren't my girls beautiful???
This was 5 years ago, and it is so fun to see how little they were!


God didn't give me girls of my own, but He did give me these sweet little ladies!  I added butterflies to their hats to echo the one in mine.


At Miss Tammy's Tea House.  It was fun to watch their reactions as people gushed over them.  It truly delighted them!


The Underwear

Not only did I make their dresses, I made them the underwear to wear under the dresses!  The little girls got drawers and a ruffled chemise.  Gracie got drawers, a chemise, petticoat, corset, corset cover and a bustle pad!  (This was the biggest project I have ever undertaken!)


Cute little ladies in their Victorian underwear!


I patterned Gracie's corset after extant ones I had seen online.  This was in the days before Pinterest.  I can't remember where I found the inspiration, but I have started a Pinterest board of Young ladies' underthings.  I used an old busk instead of buttons for the front, and as little girls' bodies are more or less the shape of sausages, I made the straps so that it would stay on her body!  It is made of pink and brown silk, because I wanted it to be pretty!


Little Girls' Dresses

For the little girls' dresses, I found this image from 1883.  I knew it would be perfect for my girls!    They were so adorable in their little Victorian dresses!


Big Girls' Dresses

I had found an image of a fabulous NFE dress some time before the finding of the silk and had been saving it for a very special fabric.  This fabric just screamed to be made into the inspiration image, so that is what happened.  Plus....tabs!!!  And buttons!!  But tabs with buttons?  I felt as though I had died and gone to costuming heaven!  I decided to make Gracie's dress as a smaller version of mine as that is what often times happened in the Victorian Era.


I can't find the inspiration image for the skirt of my dress, but it also had the tabs and buttons theme of the bodice.  Also, all the crazy tiers of the pleats!!  Pleats, tabs, buttons....my ultimate weaknesses! 


The Hat

On a trip from one of the Carolinas to Tennessee with my fabulous friend Josie, we stopped into one of the mega antique malls that dots the south.  In it I discovered this incredible butterfly made from feathers.  It had been in my stash for several years just waiting for the perfect hat to adorn.  Well, as you can guess, this became the perfect hat!  Since the dress was to be worn in a garden, I decided to cover it with flowers for the butterfly to perch on!  I have since sold the hat to a lovely friend of mine...but I do miss that hat!


It was fun watching my nieces in their dresses.  Their very nature and way of being changed while wearing them.  One of my nieces is rather a Tomboy, but when she was wearing her dress, she turned into quite the little lady!  They carefully put their gloves on and were careful to place their seat belts so as to not crush the silk.  At the restaurant they placed their napkins on their laps and didn't want to soil their dresses.  (I quickly assured them that if they did get something on the dresses it was totally ok and that we could just wash them!) For an afternoon, they were transported back in time and it was a fun transformation to watch!

Be Blessed my friends!

g

Monday, December 21, 2015

1950s Pillbox Hat Tutorial!


Ok!  It's tutorial time!  Huzzah and away!

For the 1950s Christmas Card #1 dress, I made an ermine hat to go with the ensemble. I was in such a rush that I only had time to take pictures of the buckram being cut out!  I told myself that next time I made a fur pillbox hat I would take pictures and write a tutorial.  Then, Miss Lily of Mode de Lis asked if I had any tips or tricks for making one, so this blog post is for you Lily!  And anyone else who would like to know how I made my fur pillbox hat!  Let's get started shall we?

I have been plodding along at my 1950s Christmas Separates and have only the coat and bolero to complete!  I will be doing a photo shoot with the pencil skirt and black blouse (Christmas Card #2) and the red tank top blouse that will also be worn with the pencil skirt.  Years ago, at a local thrift store, I purchased a vintage, 1950s, black curly lamb swing coat for $10.00.  I had in mind that I would disassemble it and make an Edwardian toque, large muff and stole.  Well, that never happened and I am beyond THRILLED that I didn't!  Becaaauuuusssse....I can wear it with my new found love of the '50s!  Well, because I have a swing coat, I "needed" a hat to go with it so I could do a super fun photo shoot with my new wardrobe!  Enter the creating of a new hat!

Below is one of the inspirations for the hat I envisioned with the ensemble.  Another one can be found on a Christmas Card from The Glamorous Housewife.


Found on eBay.

So let's get down to the nitty gritty!!!


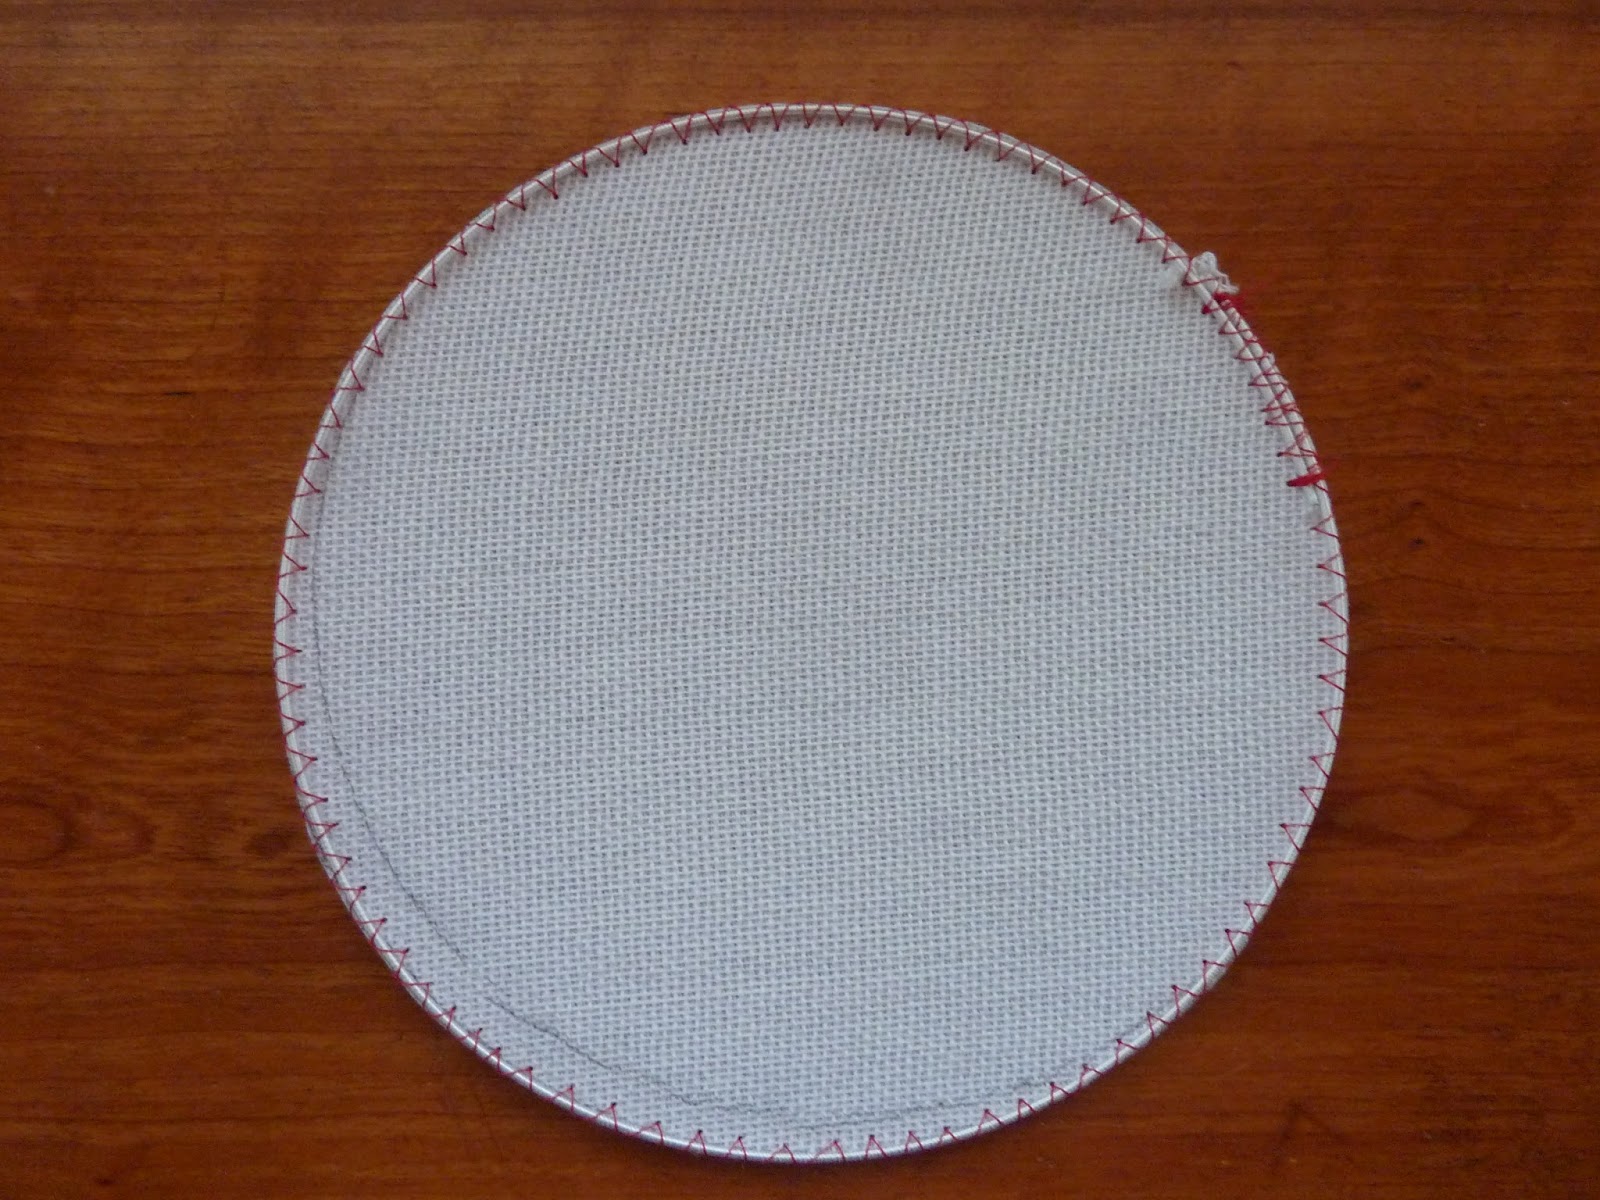
1.  Cut out crown from buckram.

The first pillbox I made was a bit larger than this one, but you can totally use the same techniques for any size fur hat.  I wanted this pillbox to be smaller than the ermine, (I actually have a vintage hat that is exactly this size, so I know it is era correct) and a saucer from my cupboard was the perfect size!!  The plate is a 6" wide one.  I traced around the plate then cut the buckram out.


2.  Sew the wire around the outer edge of the crown using a zigzag stitch.


3.  Figure out the length of the crown side buckram strip.

For this, since I am not using a pattern, I just cut out a long strip of 1.5" wide buckram.  I snugged it around the edge of the crown tip and overlapped the ends about 1".


It ended up being 22.5"


4.  Sew wire to one edge of the crown side strip, allowing for about 1" of wire to extend on both ends.  

"Cheat" Tip:  I like to sew holes on the opposite end of the wire with a non-threaded needle to aid in the sewing of the crown side to the crown top!


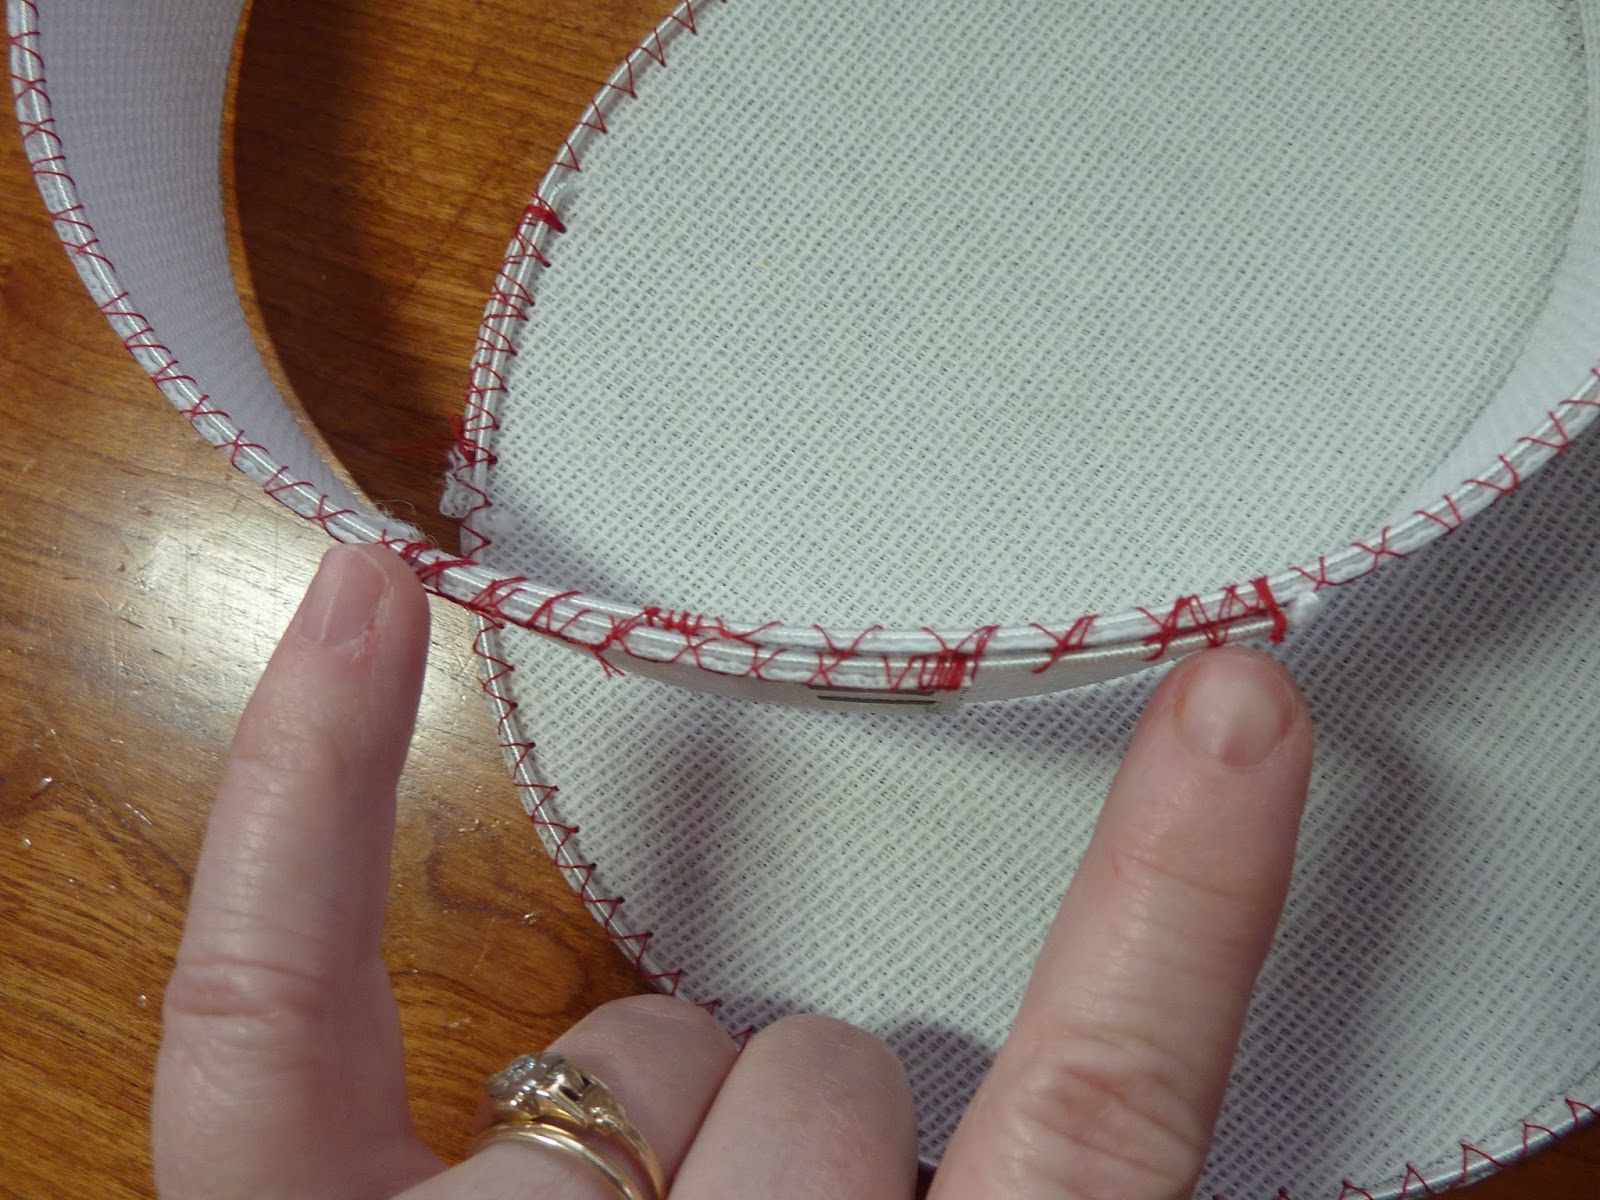
5.  Connect the ends of the crown side, overlapping to the correct circumference of the crown tip.

"Cheat" Tip:  For my own hats, I totally staple the ends of the crown sides!  You can leave the staples in, or just use them to hold the ends together while you  hand stitch the ends together.


Now here is where the those extended wire bits come into play.  For added security, I sew the wire ends to the wire on the edge with the left over thread.  That means it will stay!!!


Hopefully you can see what I was talking about here...my pinky and index finger are pointing the spots out.


6:  Sew crown side to crown top.


7:  If you haven't already done so, deconstruct your vintage fur coat.  

The vintage rabbit coat I used for the ermine hat took me about 1 hour to deconstruct.  The people who make them want to make sure the coat NEVER FALLS APART!!!

8:  Cut out your fur.

For mine, I put the saucer down on the back side of the fur.  I added 1" all away around the saucer so that the fur would extend a good ways over the sides.

*NOTE:  for all the cutting out of the fur, any fur, always cut out from the back side of the fur.  I like to use an Xacto knife*


Again, use an Xacto knife and make very shallow cuts.  Furs, especially antique or vintage ones can be delicate, so cut with care.  You don't want to cut off the actual fur, or pile.  Shallow cuts will make sure the fur on the fur side will be there!  And will cut down on all the fur fluff floating around and potentially getting up your nose!


For the crown side fur strip, I cut out a 3" by 24" strip.


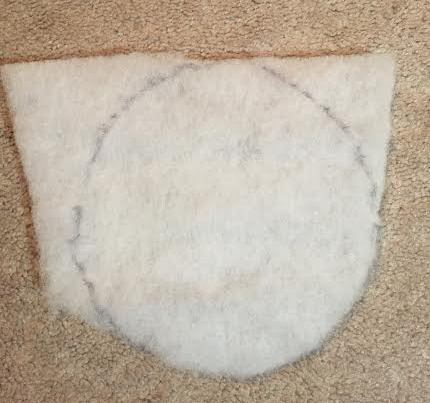
9:  Cut out any batting or mull that you feel you need.

For this hat, I just used 1/2" batting, using the saucer for a template.  This adds an extra little "puff" to the top of the hat so it isn't so flat.  There really isn't any need for mull (I use flannel) as the fur is super fluffy and thicker than silk, cotton or velvet so you don't need it to smooth out any lumps or bumps!


10:  Put batting and crown tip fur on crown tip and pin it in place.

I like to anchor my crown tips down with plain old sewing pins!  You can see them as the yellow dots in the picture.  Space them out about every 1.5 to 2".  For this fur hat, you don't have to keep the fur super tight and perfect as it's fur and any wrinkles or bumps will totally be hidden!  You really can't mess these up.  I just doubled up plain old ordinary sewing thread for every aspect of this hat.


11:  Stitch crown side to hat.

For this hat I had to fold over one of the short ends of the fur to make a nice edge.  If you are using rabbit fur or a "long" fur, I would strongly suggest cutting the fur so that the pile runs left to right.  this way the fur will look nice going horizontal.  If you do this, use the edge that the fur hangs over the edge for the starting side.  In other words, you want to place the edge that the fur hangs over down first, so that when you fold the crown side down, you have a nice, "continuous" looking side!  there will be no hint of where the fur starts and where it ends.


I like to pin the fur to the hat using my sewing pins.  Place the fur about 1/2" from the top edge of the crown tip.


Where you see my stitch is exactly the edge of the crown tip and crown side.  For this hat, you can go ahead and make your stitches bigger!


What the hat looks like before I pulled the crown side down.


12:  Pull the crown sides down and secure with pins.

Now be very careful as you pull the crown sides down.  The fur I used for this hat was quite delicate as the leather was a wee bit dry and started tearing in places.


Again, pins are lovely to keep the fur in place as it does like to shift while you are sewing.


Fur all sewn in place!!


13:  Cut out lining.

For my lining, I considered using the original coat's lining but it was starting to shatter, so instead opted for some thin taffeta out of my stash.  

I used the saucer again for a template, extending the line 5/8".  DO NOT cut out the crown tip lining the exact same size as the crown tip (in this case the saucer) as it will not look right.


Fold the circle in quarters and mark at every crease.  This will aid in attaching the lining sides to the top.


For the lining sides, I cut out the taffeta 3" x 25".  Because there is no pattern, I pinned the lining sides to the inside of the hat...


Where they met on the inside, I joined the edges together and marked where it sat snug together, then marked with chalk.


Where I marked with chalk is the inside seam.  Press open.


For the lining up marks, use the back seam for the starting point and make three other marks for a total of 4 marks.


Match up the marks and ease in any extra fabric from the crown tip.  I had a little bit.


14:  Sew lining crown tip to crown side.


Just a picture to show how the crown tip needs to be eased into the sides.


I used 5/8" seam allowance for the seam.  Then I cut the seam to about 1/4" to get rid of the bulk.


15:  Pin lining to hat.

I actually had a lot of fabric, width wise in the lining, so I cut the sides about 5/8" shorter, then folded the edges over another 5/8".  You can see in the above picture the trimmed seam...


Beginning at the back, start pinning the lining to the hat placing the edge of the lining about 1/4" down from the bottom of the edge of the hat.


16:  Sew the lining to the hat!!

I used a whip stitch to attach the lining to the hat, making sure that I got a bit of the leather of the fur and not just the curly fur.  Just getting the fur would not have held the lining in very well in this hat and it wouldn't have held it in at all with the rabbit fur!


Lining all sewn in!


17:  Make securing loops.

I haven't made any yet as I don't have any black embroidery floss, but when I do make some, I will probably place two securing loops at the place where the lining meets the wool in either side of the hat.  These will be used to attach the hat to my hair with bobby pins or small combs, like one of my vintage hats employs.

18:  Decorate!!!

For this hat, I chose a vintage Christmas corsage that I have pinned on. I don't want to actually sew anything onto it as this hat can be used for many different seasons, not just Christmas!!!

*For the ermine tails on the other hat, I simple cut slits in the rabbit fur and slid the ermine tails into the fur, then glued them in.*

And......DONE!!!


Hat on my head so you can actually see the size of it (I have a way bigger head than the mannequin does!  hahahahaha!!!) even though I am decidedly not sporting a 1950s hair do!!

Ok!  That's it!  Easy Peasy!  I hope that this tutorial helps when considering making your own 1950s Pillbox hat!!

Be Blessed my friends!

g